
Lately I've been getting a fair amount of questions regarding how I get Timid Monsters so smooth. Here are some clay-working tricks that can affect smoothness.
Handling Clay
The key to keeping prints and such off of polymer clay sculptures is a learned, very light touch and short fingernails. My current Timid Monsters have evolved quite a bit since the first I made; a lot of the improvement came from just practicing and making things. I can't say for certain without doing a lengthy tally from records, but I've made hundreds to date, and I'd go so far as to say I've made at least 1,000 Timid Monsters since I first started. That is a lot of practice.
A lot of the smoothness comes from how I form the basic shape. The basic shape is formed with a combination of hand forming and rolling on my work surface -- a large piece of granite tile. I always end basic shaping with a good, light roll against the tile before moving on to details. This usually removes any small divots, dings, or fingerprints.
Tools
Tools are very important in my opinion. My arsenal includes
- granite tile, my work surface. I might be lying. It might be marble. I honestly cannot remember what I bought more than a year ago.
- awls--I have three because I misplace them often
- a weird handy-dandy purple... thing... that I'm not sure where I got or what it really is for
- a set of lock picking tools I picked up at a dollar store (mine look like awls bent at various angles)
I use the awls and lock picking set to join body parts and "seam" clothing. For instance when I make pants, I am applying and blending together an average of four pieces of clay. I also use awls to form their legs and, once-upon-a-time the holes for their horns and eyes. Now I use the purple thing-y.
- adjustable pasta roller
- hand roller
The rollers are used to make large sheets of clay to cut from. Quite often I need the clay to be thinner than the thinnest setting on the pasta roller so I roll it out by hand.
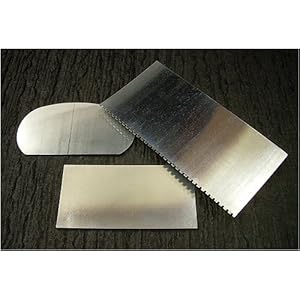
- various steel scrapers
- some tiny clay cookie cutters that I either don't use or use incorrectly to make half or altered shapes with
- many, many, many sizes and shapes of razorblades
- a 6inch flexible blade
- funny edged scrap booking scissors
The various blades are used for cutting! I cut out both large pieces for clothing, hair and such and small pieces like the flame dancer from DMB. The steel scrapers I mostly use for hand forming small details on (for instance the flame dancer from DMB, the cubby bear for the Chicago Cubs, and flowers for bouquets and habitats), because after they are formed, I can easily remove the item from them with a little bend and a wide flat-edged razorblade. The shape-cutters are used when I want a specific shape perfectly formed or perfectly repeated. For instance, the Janet Weiss bra used the bottom half of a tear-shaped cutter. I also use the tear shaped cutter to make a rough guideline when I have to make violins. As far as the scissors go, I mostly use them to make mock lace trim, like on that last link or on Janet Weiss's slip.
- bake-able clay glue is really useful for attaching details so you don't have to smash them on. I use it mostly when Monsters need to hold things.
- various odds and ends for texturing, including rocks, stamps, and this weird roller for metal foil with different attachments I found in the wood working section of Hobby Lobby
- q-tips
- rubbing alcohol
The moral of the tool story, is that the more you use tools that aren't your fingers, the less chances you have of leaving fingerprints or fingernail nicks.
Unavoidable fingerprints or dust bits
When the clay is more mushy and prone to fingerprints--like stupid Scupley III Moss Green--a q-tip dipped in rubbing alcohol will remove unwanted marks. This will also remove dust bits that seem to attract to lighter colors--like white--no matter how clean your work area is. I've heard that cotton balls or tissue can also be used, but I find it leaves so many dust bits or cotton particles that you are worse off than when you started.
On the mushy note, if you stick it in the fridge for a bit, it will firm up and be less mushy. Usually.
Baking
To a lesser degree how you bake polymer clay might affect the smoothness. I believe when I don't preheat, but bake for longer than I normally do to make up for the lack of preheating (which still isn't as long as I ought based on the directions but I don't want to bake, cool, add, bake, cool and horns burn at the proper length), the Timid Monsters are a little smoother. I theorize that this is because the clay "melts" just a tiny bit as the oven heats up before it actually begins to bake and set. But honestly I have no idea if this plays a part or if it is just my imagination.
Shining or "shellac-ing"
I don't like to shine my clay sculptures, which is a rather popular practice amongst polymer clay users. I think it looks weird, artificial, and highlights any defects that might otherwise escape notice such as small missed prints or unevenly sized/shaped arms. I've even been reprimanded for not shining my Timid Monsters and told I wasn't a real artist and that Timid Monsters didn't count as real sculpture unless I shined them because they were "unfinished." Clearly I didn't pay this person much attention as I still will not shine Timid Monsters.
The only time I use any kind of air dry glaze is when I've embedded things into the clay for decoration, such as glass seed beads or small shaped metal designs. I use a satin matte finish after baking and cooling to coat the decorations and help hold them on.
EDIT: I was reading over this and thinking about Timid Monsters versus... say... "people" or more humanoid sculptures I've seen. I don't know if this is entirely true, but it seems a lot of other polymer clay-ists seem to work either top-down or bottom-up. Meaning. Ok shoes are white so start with white clay, then socks will be blue so lets add some blue cylinders to the tops of those shoes, then some flesh tones cylinders for legs, a bulk of brown for shorts to balance on top of those legs, etc. My themed or otherwise accessorized Monsters all start as basic shapes and then get dressed. I think that makes for much less touching and smooshing of pieces together. If I made people or fairies or gnomes or trolls, I'd probably start by making a flesh-toned naked guy, and then I would dress him the same way I dress Timid Monsters.
I can't imagine a shellacked timid monster! NO!
ReplyDelete